The typical foundation repair process consists of 6 main steps. However, there are a series of intermediary steps that are just as important. Knowing all the steps involved in the foundation repair process will allow you to better understand what you can expect when repairing your foundation and what you should do before, during, and after the repair. To help you prepare yourself for this major undertaking, here is a detailed explanation of all these steps.Step #1: Plumbing Inspection
Once you’ve learned that your foundation needs repair, the next step is to schedule a plumbing inspection. In general, our professionals take a look at the plumbing system during the foundation inspection. However, that’s not something that every contractor will do. If you already had a foundation assessment done, but the professional didn’t inspect your plumbing system as well, make sure that you have your pipes checked before any repair work commences.
A plumbing test will reveal any plumbing issues that may cause new foundation damage down the road. If you choose a foundation repair contractor that also offers plumbing and sewer line replacement services, the workers will be able to repair or replace any damaged pipes during the foundation repair. In that situation, the overall repair costs could be much lower than what you might otherwise need to pay for two or more separate repairs.
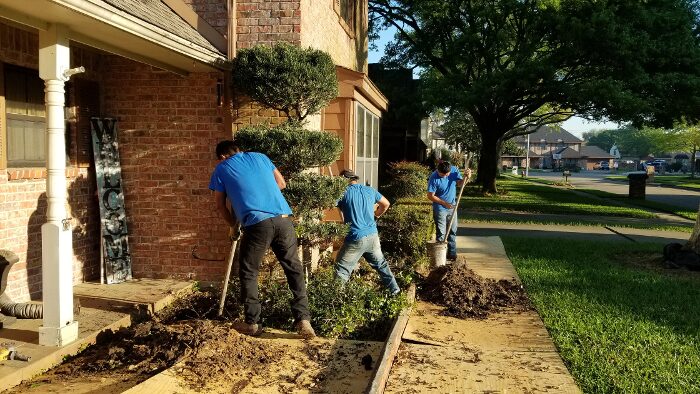
Step #2: Site Preparation
Before beginning to work on your foundation, the crew should remove all the plants, rocks, debris, furniture, and any other items that are located close to your house. To ensure unencumbered access to work areas, the repair professionals might ask your permission to level the ground as well. That may allow them to do their job faster.
If necessary, the workers will also lay down tarps and plywood boards to prevent damage to landscaping and paved areas. Depending on the location and extent of the damage and the repair method specified, the crew may also need to disconnect the underground utilities. If the repair process involves accessing the problem area from the inside of your home, the professionals will use tarps and plastic sheeting to protect your floor and furniture from dust, debris, and accidental damage.
Step #3: Tunneling and Digging
After prepping the site, the professionals will start to excavate and/or dig holes under your foundation. The depth of excavation and number of holes the workers will have to dig is dependent on the type of foundation you have, the extent of the damage, and recommended course of action for fixing your foundation.
As an example, if you have a pier and beam foundation with only one damaged pier toward the outer side of the foundation, the workers will dig out that pier and install a new one instead.
On the other hand, if several piers have been damaged underneath your pier and beam foundation, or your home rests on a slab-on-grade foundation that has settled unevenly, more extensive digging may be required.
In the first case, temporary supports will be placed underneath the foundation to ensure its stability until new piers are installed. In the case of a slab-on-grade foundation, the workers will need to dig multiple tunnels at regular intervals underneath the home and use hydraulic jacks to drive the piers into the ground to a “point of refusal”. The foundation repair process also involves ensuring a level position within permissible tolerances. Installing metal shims may be necessary to slightly adjust the height of the piers and achieve the levelness tolerances specified.
Step #4: Backfilling
As soon as the repair has been done, the workers will use the backfill soil to fill in the tunnels and holes that were initially dug to install the piers. Although the backfill soil should be compacted properly, it’s usually piled a little bit higher than the surrounding ground. Over time, the extra soil will slowly sink into the ground and become fully compressed.
Step #5: Soil Stabilization
In the Houston-Galveston area, foundation repair professionals sometimes recommend specific soil stabilization methods that reinforce the ground underneath the home for increased stability and durability. By providing additional support to the structure on top, the right soil stabilization method will maintain the house in the same level position for many years to come.
Step #6: Cleaning up
Once all the repairs have been completed, the workers will remove the debris, tarps, plywood boards, and plastic sheeting and put back all the items that were initially removed.
Step #7: Cosmetic repairs
When having your foundation repaired, a series of cosmetic issues could occur throughout your home. Because the satisfaction of our customers is very important to us, our standard service agreement also includes cosmetic fixes caused by our repair. However, most foundation repair contractors won’t fix cosmetic damage resulting from foundation work. So, to make sure that your home will look even better than it did before the repair and save some money on cosmetic repairs, it’s important to hire a foundation repair contractor that offers a complete range of services.
To learn more about our foundation repair process and how it can add decades of stability and durability to your home, contact our representatives today!